White Chocolate, Raspberry, and Almond Molasses Brunettes


Sometimes you start out with one thing, and end up with something completely different at the end. While that seems to be the story of my life, this "cake" is the perfect example. I was scrambling to make last minute blondies to bring to a dinner at a friend's house and quickly started assembling the ingredients. I had just used up the last of my reserves of brown sugar and didn't have much time to run out to the corner deli. Aha! Why not make my own brown sugar? Dusting off my jar of molasses from Christmas (whoops...lol) I added it to my regular white sugar. Except I added too much. Sigh. With no time to spare, I continued with the recipe. When I arrived at my friend house, I soon learned that they didn't like blondies. At all. Breathing a sigh of relief, we all took turns tasting these blondies turned "brunette." The molasses is the biggest difference, making them moist and gooey with a layer of raspberry and crunchy almonds in the mixture. I would definitely add more white chocolate, since they seemed to have dissolved. In the end, while things don't go as planned, it work outs in the end. Good to know.


White Chocolate, Raspberry, and Almond Molasses Brunettes

2 1/2 cup of all-purpose flour
2 1/2 teaspoon of baking powder
1/4 teaspoon of salt
14 tablespoons/ 1 1/2 stick + 2 tablespoons of butter
2 cups of white granulated sugar
1/4 cup of molasses
1 1/2 teaspoon of vanilla
3 large eggs
1 cup of slivered almonds
1 cup of white chocolate pieces ( I would add more as the molasses tends to overpower the white chocolate)
1 cup of raspberry preserves


1. Preheat oven to 350 degrees and butter two 9x9 pans or one 10x15 pan.
2. Sift together flour, salt and baking powder. Set aside.
3. Cream butter, sugar, and molasses. Add vanilla and eggs one at a time. Mix well after each addition.
4. Incorporate flour mixture with the wet ingredient. Add almonds and white chocolate pieces and mix well.
5. Spread half the batter and swirl in raspberry puree. Add the rest of the batter. Bake for 30-40 minutes or until toothpick comes out clean. Cool and devour.


Campfire S'mores Cookies


This is probably the recipe that most of my friends have been waiting for, considering I made multiple batches and had them try it. For a while, this recipe was pretty popular around the internet, and for good reason. It is very sweet, and to me that makes it so much better. Instead of graham crackers, I actually used cinnamon toast crunch cereal. Let's just say, WOW. I love love love how the cookie batter turned out. It's soft and chewy, with a caramelized taste and texture due to the cereal. The second time I made it, I didn't even need to use chocolate chips in the batter, the chocolate pieces and marshmallow were good enough. Aesthetically and epicureanly pleasing, these cookies are a crowd please. Best thing about 'em, they taste great the day after. If they even last that long.


I played around with the recipe after running out of Hershey chocolate bars. I drizzled them with with Nutella instead and even used Whoppers I had lying around. Improvisation can lead to magical things.


Campfire S'mores Cookies
adapted from Stephanie Cooks

1 1/2 cups all-purpose flour
1 cup of Cinnamon Toast Crunch cereal, pulverized or smashed into crumbs
1 teaspoon baking soda1 teaspoon salt
Dash of cinnamon1 cup (2 sticks) unsalted butter
3/4 cup of sugar
3/4 cup of brown sugar
1 teaspoon vanilla extract
2 eggs
2 cups of mini chocolate chips
1 1/2 cup of mini marshmallows
2 Hershey's Chocolate Bar, chopped into chunks

1. Preheat oven to 375F degrees.
2. Mix flour, cereal crumbs, baking soda,salt, and cinnamon in a bowl.
3. In a separate bowl combine butter, sugar, brown sugar, and vanilla until smooth and creamy. Add eggs one at a time. Make sure to fully incorporate the first egg before adding the next.
4. Slowly combine the flour mixture into the butter mixture until incorporated. Add in mini chocolate chips.
5. Place scoops of cookie dough on a cookie sheet (parchment or wax paper can really come in handy). Bake for eight minutes or until almost done.
6. Remove from oven and place marshmallow and chocolate pieces into each cookie. I usually like to add three mini marshmallows and two broken pieces of chocolate. Return to the oven and bake for an additional 3-4 minutes or until done.
7. Cool on rack before handling. I repeat, they are very fragile while warm!

Blueberry Crisp


The best way to enjoy summer is to make a dessert made from fruit. While I tricked myself into believing this blueberry crisp was healthy (it is!), I was busy getting my fill of Vitamin C to really care. Desserts containing fruits never used to entice me, being the chocolate fiend that I am, but working on my children's literature final project forced me to actually try a recipe. I was working on a cookbook and I thought this blueberry crisp would be a great match for the classic children's book Blueberries for Sal. Does anyone else remember the story of Sal "helping" her mother by picking blueberries and encountering a bear cub? Ah, youth.


The ingredients and preparation for this dessert is simple and straightforward. Let's just say, and I am not saying this lightly, it is incredibly good. I made it at midnight in a 9x9 baking dish, and by 7AM the next morning, the glass baking dish was scraped clean by my tendency to "have a little more." Still not convinced? Imagine warm, sweet and bubbling caramelized blueberries with a sprinkle of a buttery sugar crumb on top AND on top of that, icy cold and creamy vanilla ice cream. Told ya.


Blueberry Crisp


1/2 cup all-purpose flour

1/3 cup and 1/4 cup granulated sugar

1/2 teaspoon cinnamon

4 1/2 tablespoons unsalted butter

2 1/2 cups fresh blueberries

2 tablespoons lemon juice

2 teaspoons cornstarch

vanilla ice cream (not really optional)

whipped cream (ditto)


1. Preheat oven to 350F degrees.

2. Combine the flour, 1/3 cup of sugar, and cinnamon in a bowl. Cut the butter into the flour mixture and blend with a fork until mixture is crumbly. Set aside.

3. Sprinkle lemon juice over the berries and mix. Combine 1/4 cup of sugar and cornstarch and sprinkle over berries and lightly toss to coat.

4. Spoon berries into a 8x8 pan coated with butter or cooking spray. Sprinkle crumb mixture over berries.

5. Bake for 30-40 minutes or until bubbly.

6. Serve with a scoop of ice cream or with whipped cream


Sour & Sweet: Lemon Tea Bread


One of the good things about this bread is the glaze, which leaves the top part incredibly moist and sweet. Yum!


Last month was the final goodbye for my internship at Good Housekeeping Institute. Feeling nostalgic, I flipped open the Good Housekeeping Cookbook and naturally went over to the back where the desserts, fruits, and quick breads were listed. Thumbing through the pages, I was looking for a quick and simple recipe to try. I adore cookbooks, and before allowing it to grace my bookshelf, I have to make something from it. I just can't help it, I get so excited! People read comics, I read cookbooks for fun. Scanning the pages, I immediately picked the lemon tea bread. After my initial success with lemon bars (recipe and post coming soon!), I have been searching for the next lemon recipe to satisfy my mouth with some sour pucker-punch.


Lemon Tea Bread

Bread
2 cups of all-purpose flour
1/2 teaspoon baking powder
1/4 teaspoon baking soda
1/2 teaspoon salt
1 1/4 cups sugar
4 large eggs
8 ounces (1 container) of sour cream
1/2 cup (1 stick) of butter, melted
1 tablespoon freshly grated lemon peel
2 tablespoons fresh lemon juice

Glaze
1/3 cup sugar
1/3 cup fresh lemon juice

1. Preheat oven to 350F. Grease a 9x5 metal loaf pan and dust with flour.
2. In a large bowl, whisk flour, baking powder, baking soda, and salt. In another bowl, whisk sugar and eggs until blended. Add to this mixture sour cream, butter, lemon peel, and lemon juice and stir until incorporated. Combine the wet ingredients to flour mixture and fold until blended and no streaks of flour remain.
3. Pour batter into loaf pan. Bake for approximately 55-60 minutes, or until toothpick comes out clean. Place pan on a wire rack.
4. For the glaze: Stir together sugar and lemon juice. Using a skewer, poke holes in the hot bread and brush bread with glaze. Cool bread completely in pan.


This bread is just honest, simple and good. As the name implies, it goes great with tea.


Death By Nutella: Nutella Fudge Crumble


First, I would like to thank my friend Fanny for getting me an industrial sized Nutella tub. That is true friendship. Lugging it back home, I mused on what I could possibly do with all 26.5 ounces of nutty chocolate love. My solution was bookmarked on my computer, a recipe for Nutella fudge crumble. If you intend to make this, it is a serious commitment to Nutella. This thick, fudgy, crunchy topped oatmeal treat can only be washed down with a cold glass of milk. I suggest small servings to refrain from drowning in a Nutella overload (not like it would be such a bad thing...).


Nutella Fudge Crumble
adapted from eatmycakenow

1 cup all-purpose flour
1 cup old-fashioned rolled oats
3/4 cup of brown sugar
1/2 teaspoon of baking powder
pinch of salt
1/2 cup (1 stick) of melted butter
10-13 ounces Nutella (approximately one tub)

1. Preheat oven to 350 degrees. Butter 8x8 baking pan.
2. Mix together flour, oats, brown sugar, baking powder, and salt. Add melted butter to the mixture. Divide the dough in half.
3. Taking one half of the dough, gently press dough to the bottom of the baking pan, making the first layer.
4. Pour Nutella over the first layer of dough. While I wrote one tub of Nutella, it depends on how thick of a Nutella layer you prefer. This is a very sweet dessert so I would recommend around 8 ounces, which would make it more of a bar cookie instead. Add more or less if you wish.
5. Gently crumble the remaining dough over Nutella.
6. Bake for approximately 20-25 minutes or until the oatmeal topping is golden. Do not overbake unless you like a crunchy crust and topping. I must admit, it tastes much better when it isn't so granola-esque. Cool for approximately one hour before cutting.


Apple Cake


cinnamon + sugar + apple = yummy comfort


caramelized sides with an almost delicate, custard top


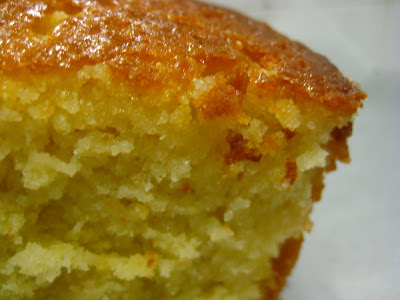
A simple name for a traditional cake. Not so fast there. This cake is amazing. After coming across the recipe on Smitten Kitchen, I felt compelled to make it. After my initial success with bananas, tackling apples seemed like the next logical choice. Being an avid fan of apple and cinnamon, this cake sounded pretty good. I was shocked at how much I adored it. I kept sneaking bites from the kitchen, until suddenly, all that was left in my pan were crumbs. Consider yourself warned.


Apple Cake
adapted from Smitten Kitchen

3 medium sized apples ( I used cortland apples)
1/2 tablespoon of cinnamon
2 1/2 tablespoons of sugar
1 1/3 cups of all-purpose flour
1/2 tablespoon of baking powder
1/2 teaspoon of salt
1/2 cup of vegetable oil
1 cups of sugar
1/8 cup of orange juice
1 teaspoons of vanilla
2 eggs

1. Preheat the oven to 350 degrees. Butter/grease a 8x8 baking pan. I baked this in a dark glass pan which resulted in a crispy, almost caramelized sides.
2. Peel, core, and dice apples into pieces. Combine with cinnamon and the tablespoons of sugar. Set aside.
3. In one bowl, combine flour, baking powder, and salt. In another bowl, combine oil, orange juice, sugar, and vanilla. Mix the wet ingredients into the dry ingredients. After, incorporate eggs one at a time.
4. Pour half of the batter into the pan and top with half of the apple-cinnamon mixture. Pour the rest of the batter on top, and scatter the remaining apple pieces over it. Bake for approximately 30 minutes, or until toothpick comes out clean.


apple chunks embedded in the delicate crumb cake interior


Banana Cupcakes With Cream Cheese Frosting


Why hello there...


I love baking with bananas, no ingredient is so versatile and forgiving at the same time. For a new baker, this is godsend. Before I started baking, I believed an exceptional dessert had to contain chocolate as an ingredient. This recipe will change your opinion. The cake is light, fluffy, and full of genuine banana flavor. The cream cheese frosting (my favorite!) is tangy, sweet, and silky smooth. Together, divine.

These cupcakes are also great on their own.


Banana Cupcakes

1/2 cup (1 stick) of unsalted butter
1/2 cup of white granulated sugar
1/2 cup of (lightly packed) brown sugar
1 egg
1 tablespoon of vanilla extract
1 1/2 cup (approximately 4 medium sized) mashed bananas
1 1/2 cup of all-purpose flour
1 teaspoon of baking soda
1 teaspoon of baking powder
1/2 teaspoon of salt
1/2 teaspoon of cinnamon

1. Preheat oven to 350 degrees.
2. Cream butter and sugar until smooth and fluffy. Add egg and vanilla until combined. Combine with mashed bananas.
3. In a separate bowl, sift flour, baking soda, baking powder, salt, and cinnamon and stir.
4. Pour banana mixture into the flour mixture slowly. Mix until all ingredients are combined.
5. This mixture makes around 12 cupcakes, but can also be baked in a 9x13 pan. Pour into pan or cupcake liners and bake for approximately 25 minutes, or until toothpick comes out clean.


Cream Cheese Frosting
adapted from Southern Living

1 (8 oz.) package cream cheese
3 tablespoons of butter
pinch of salt
1 teaspoon of vanilla extract
1 1/2 cups of powdered sugar

Combine cream cheese and sugar until smooth. Add salt and vanilla extract. Slowly incorporate powdered sugar until combined. Use more or less the amount of powdered sugar, depending on how sweet you prefer your frosting.


3 layers of goodness...

Copycat Levain's Cookie


Can this pass for a Levain cookie?


It's that time of the year. Papers, presentations, and finals. Summer is SO CLOSE but still so far away. When stress hits, the procrastinator in me runs towards the kitchen and starts whipping something to loosen up. With the impending doom of three papers coming up, what did I end up making? I attempted a Levain cookie. I know, seriously, is that even possible?! I came close, but really, I would pay $4 in a heartbeat for one of their hefty mounds of cookie dough and chocolate goodness. I found this popular copycat recipe online and started preheating my oven.

What is a Levain cookie you ask? Please Google it! To make a long story short, the Levain Bakery is synonymous for their 1+ lb. chocolate chip cookie goodness. My favorite being their dark chocolate chocolate chip, but that's a whole other story. To me their cookies signify giddy afternoon sessions of Central Park picnics, voraciously gobbling them down, and wondering how I managed to eat it all in one sitting. If you can get to Levain's, go now. If not, give these a try.

Copycat Levain Bakery Cookies
adapted from lisamichele

2 sticks of butter (1 cup)
1 cup of brown sugar
1/2 cup of granulated sugar
2 eggs
3 1/4 cups of all purpose flour
1 teaspoon of salt
1 teaspoon of baking powder
1/4 teaspoon baking soda
1 package (12 oz.) of semi-sweet chocolate chips
1 cup of walnuts

1. Preheat oven to 350 degrees.
2. Arrange walnuts on a baking sheet. Bake for 8-10 minutes, until lightly toasted.
3. Using a mixer, cream together the butter and sugar until fluffy. Incorporate eggs one at a time.
4. Add flour, salt, baking powder, and baking soda. Mix until combined. Add chocolate chips and toasted walnuts.
5. Transfer dough to a flat surface and combine chocolate chips and toasted walnuts by hand.
6. Divide the dough into 12 equal portions. Place on parchment paper lined cookie sheet.
7. Depending on how "done" you would like your cookies, bake for 25 minutes for a well done cookie, less time for a more raw cookie. Personally, i like them slightly raw and gooey in the middle. :)


One last bite...